HOW TO MAKE YOUR TENT LAST LONGER?

A major factor in purchase of anything is the durability of the product.  All outdoor products have a lifespan.  At Gipfel, our endeavour is to make quality products that will last long, and do not add to the pile up of garbage and increase our environmental footprint.

In that spirit, how long do the tents last?

There is really no short answer to this!

A good analogy for a tent of any quality, is cars.  Consider this, if you do not put a lot of mileage on your car, and if you take care of it, the car will stay pristine for a long time, and then there is correlation between the initial build quality, use, and maintenance, and longevity.

But we do not make Gipfel tents hoping they will sit on the shelf.  We make our tents in anticipation that they will be put through the worst weather there is.

Firstly, the life span will vary considerably basis use.  Tents bought for personal use will last much longer than the same tent that will be used by a commercial tour operator or a tent bought for collective use by clubs, etc.

With good care and maintenance, a Gipfel tent will last you between three to eight years with frequent use.  

The basic longevity comes from the quality of materials, coatings and manufacturing.

Factors that will determine the life span of your tent

  1. Build quality and Materials


If you want a durable and a quality tent, that functions as it should in the inclement weather, start with a tent that uses high quality components, and focuses on manufacturing quality controls.


At Gipfel, we choose world class components whether it is the poles (all our top end models use DAC or Yunan poles), the fabrics, or accessories like the zips (we use only YKK zippers).  Our processes ensure qualitative build of the tent.


Even amongst good quality tents, some tents last longer than others.


Some tents are built for endurance and will last a decade, some focus on use in extreme conditions and should be replaced or repaired every couple of seasons with extreme use.


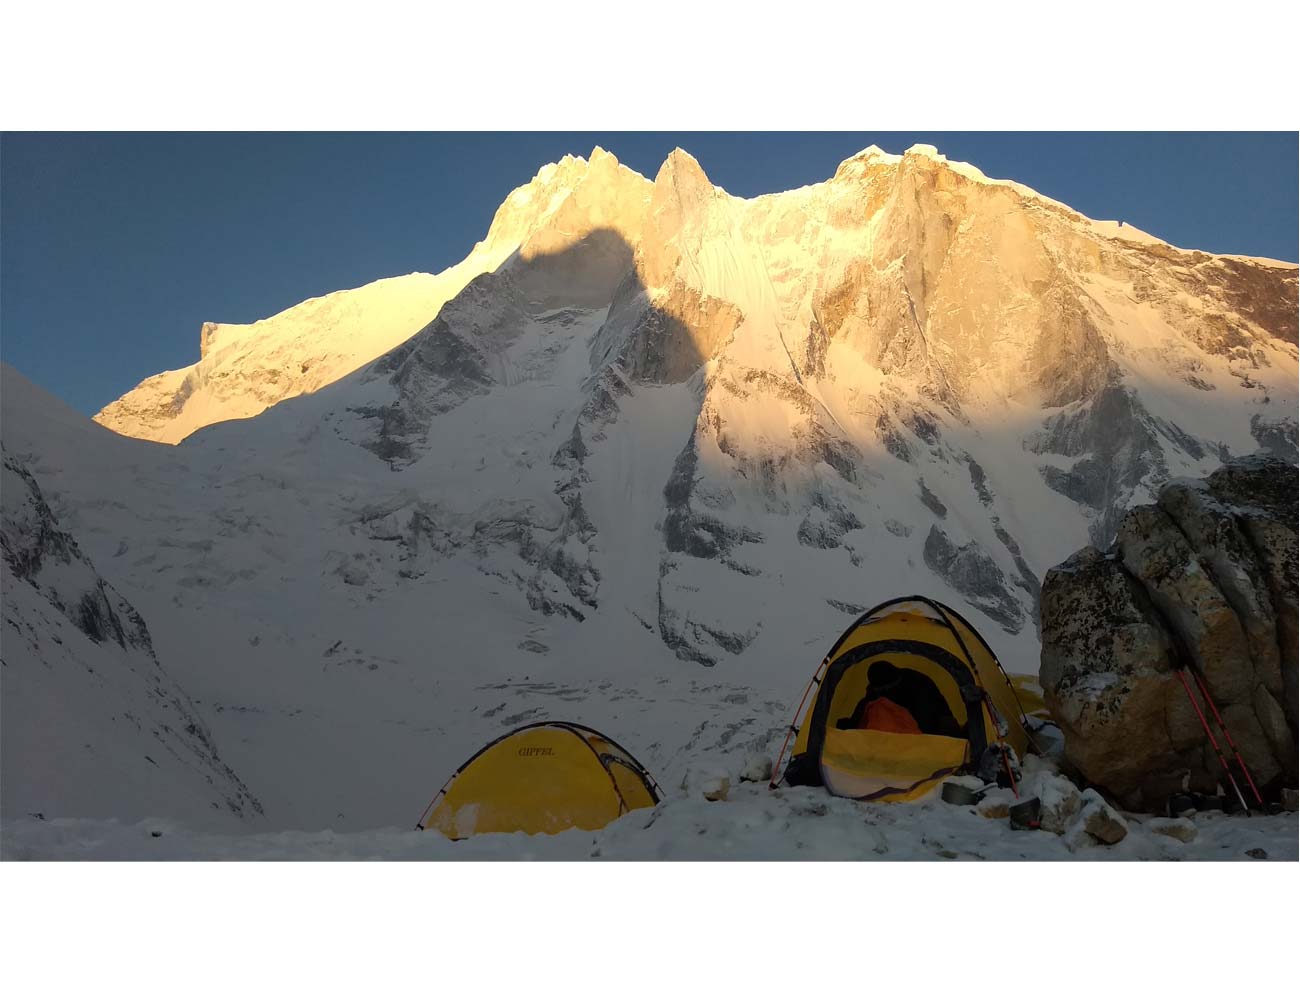
A car camping tent typically will last longer than a tent bought for high-altitude expeditions.   While car camping, you will handle your packed tent a lot less, and the typical weather it is pitched in is lot less severe, than say the high altitudes, where the rain, snow, and importantly the UV radiation is much higher.


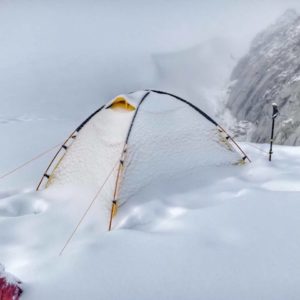
To give you a reference point, we anticipate a Gipfel Norra 3 tent will last for 5 years if it is used 50-60 days, at an altitude of 3,500 – 4,000 meters.  The lower these numbers, the greater will be the life span. 


So, does that mean we anticipate 250-300 days of use from a tent such as Norra 3.  If being used continuously within a year, we expect the use-days to be higher, because the age-based degradation wouldn’t have set in as yet. 


If you think about it, that is a bold assertion from our end.  UV exposed tents have known to start degrading within a month of being pitched.


  1. Frequency of use and altitudes


The more frequently you use your tent, the faster it will wear down because of UV exposure. The same applies to the altitude.


Prolonged UV-exposure wears down the tensile and tear strength of the textile. It also deteriorates the coatings on the textile.


This is when you take care of the tent properly and follow the tips given below.


Note: We infuse UV stabilizers in our textiles for 4- season tents to retard degradation.


The Accelerated Weathering – UV exposure chamber test help us determine the impact on these changes to UV exposures. The amount of UV rays a textile will be subjected to in say 6 months at a 3,500 meters altitude above sea level, the chamber can produce that in just 2 days of testing. After the exposure, we test the tear strength again to check the impact.


  1. Storage


Always dry your tent before packing in, especially for long term storage.  Ensure all the moisture is removed.  In the short haul, and while on expeditions, this might be difficult to do.


The biggest enemy of a tent is the mold. Everything else is reparable, but not the mold.


Once the tent catches mold, you will have to discard it. The textile cannot even be cut and used to make something else. You know that the tent is moldy, if it releases a string musty smell. Also, you will see small brown spots forming on the textile that may be removed temporarily after wiping but it will return. The PU coating will also peel off rendering the tent less water resistant.


Have you ever been in a tent that had that sharp musty smell that reminds you that the tent might be pretty old, that is the smell of PU. Someone has not been listening and been packing the tent damp!


Every Gipfel tent has an instruction sewn inside the inner tent pocket that reads as following.


Roll the tent for packing.  Do NOT stuff the tent.  Repeated creasing and folding will eventually damage the waterproofness of the tent.


  1. Pitching: Watch for the Failure modes and Prevention

Poles:


Gipfel tent poles are made of highest grade of Aviation Aluminium (7000 series) AND they should last a lifetime.  However, this is one of the single biggest failure-point of the tents in the field, especially with our Commercial Operator customer base.


These pole segments are joined with the help of inserts between the poles.


If the poles are not properly joined, and the insert tubes are visible, the poles may snap.


We provide a repair tube with every tent. Click here to check out how to use a repair tube. The same applies when you take them apart.


We do provide the service of replacing the snapped pole segments, and the poles could be repaired at home with stretch cord, and we find this to be the single most damaged element of the tents.  Our valuable commercial operator customers reach out to us to replace 100s of these poles every year.  And all it takes is a bit of sensible care to ensure you have a fully functioning tent in the field.


Zippers:


The YKK Zippers we use in our tents are heavy duty and are rated to work efficiently even at -60 degrees Celsius.


And they should last the lifetime of the tent.  However a busted tent zipper is the most annoying thing you could have, after the poles snapping, and fabric tears.


However, just take care of the small things like keeping them clean of dirt and grit, not to brute-force the zipper when it gets stuck in the fabric (work it gently to remove the snag), and use zipper lubes periodically after every season to keep them working smoothly.


Fabrics:


The tents we make are absolute beasts in handling inclement weathers.  But these beasts still need tender loving care.


Do not walk in your tent with your crampons or ice cleats on!  This is the single biggest issue we see with the tents that come back for repairs from our customers.  (We offer replacement inners and outers, and foot prints.)


To extend the life of the fabrics and the tent overall:

  • Use tent foot print or ground sheet underneath your tent, when you can.
  • Protect your tent from UV, when you can and as you can.
  • Keep the insides and outsides clean of dirt and grit.
  • Do not machine wash your tent, If washing, set up your tent, and sponge it down with a non-detergent mild wash, and dry it out completely in shade preferably.
  • Re-waterproof your tent as per recommendations below, use a seam sealant available (Coghlan’s Seam Seal is available locally).


Where to Pitch:

Take time to clean your camp site.  Sharp stones and roots poking out of the ground will damage the tent.

As mentioned above, UV damage is real and can degrade and destroy the fabrics over a period of time.  So, pitch accordingly.


  1. Is there any spray to replenish the waterproofing of an old tent?


Waterproofing (water resistance)? No!


Water-repellence /DWR? Yes!


The waterproofing (water resistance is  a more appropriate term) comes from the PU coating on the inner side of the outer rainfly.


Anything coated on outside like DWR or Silicone, like in case of Gipfel tents – Silicone, only makes it water water repellent and not water-resistant.


The water repellence only helps in keeping the textile from absorbing water and stretching and sagging. It also offers the dye and textile some fastness to UV rays.

This water repellence lasts only few months with frequent use, so there is spray-on stuff available in the market that replenishes the water repellence, but that’s it.


This outer coating alone cannot make the tent water resistant. The inner coating is what will give water resistance. Unfortunately, once the inner coating comes off, there is little you can do because it cannot be sprayed on.


Here are some tips on proper tent usage and minor repairs. Click here


Have any comments? We would like to hear from you in the comments section below.

HOW TO MANAGE CONDENSATION IN SINGLE LAYER TENTS?

In 2018, Gipfel Climbing Equipment created a revolution in India by launching Kyra 2, a single-wall, four-season tent, and at quarter or a third of the price of similar tents available in the global market.

At the time, we had no certainty of the demand for the same in India, but our goal was to provide a product to further the Indian mountaineers’ Alpinism goals.  We got some brilliant response to the tent.  While our focus was the Indian market, a large part of that sales are to the global market.

Along the way, we have gone through four iterations of the tent, changing the design of the vents, choice of fabrics and materials to ensure further weight savings, but importantly to ensure better condensation management in the tent.

We also find ourselves on occasion guiding away some of our customers towards double-wall tents, when we feel the nature of their requirements don’t meet need to invest in a single wall tents.

Kyra 2 is a specialist tent that shines through in certain situations, for Alpine style climbing during certain seasons.  Single-wall tents aren’t for everyone.

We have compiled some notes to help you make a better choice.

PROS:

Weight: Single wall tents provide great value to weight proposition for Alpine applications.

Small footprints: The optimal footprint of Kyra 2 (at 120 cm by 215 cm), allows it to be pitched in tight spaces, and is relatively bombproof because the design and the optimal canopy area in high winds.  The footprint of a tent might not seem critical for generalist camping use, but when you are digging out a ledge on hardened ice and snow slopes at the end of a mountain day, you would appreciate the minimalist footprint of Kyra 2.

Ease of setup: Kyra 2 sets up in less than a minute.  It remains in ‘shape’ with just four pegs.  And has an additional four guy out points for additional anchoring.

Price: In general, Single-wall tents are EXPENSIVE.  But Kyra 2 is priced at Rs. 11,999 for India, and Euro 280 ((Jul 2019 pricing).

CONS:

As iterated, Single wall tents are specialist tents.

Durability:  One, they are constructed with lightweight materials, so the durability over the long-term is compromised.  Suggested life of most single-wall tents about 50-60 nights of use before the fabrics’ coating wear off, or the floor develops issues.  However, Kyra 2 uses 50D breathable polyester with 3000 mm PU coating.  We have by far one of the most durable fabrics in use for a single wall tent for such a design.  This compromises with the weight slightly, but Himalayan pursuits uniquely require more number of days in the mountains, and we have specifically designed Kyra 2 with this in mind.  But still, in relation to double wall tents, there is a compromise with respect to durability.

Tight spaces: The very thing that makes them so special, the minimalist size, also could mean cramped quarters.

Condensation: The biggest challenge with Single wall tents, however, is the condensation issue.  Condensation is contributed by many factors, including our breathing (while inside the tent), natural humidity, wet gear, cooking, or from the ground below (especially from damp ground or grass).  You can’t completely avoid condensation.

But Kyra’s choice of breathable fabric, and venting system helps to reduce the condensation as much as possible.  Additionally, shrewd management from the user will help much more in this objective.  See below for some tips on condensation management.

HOW TO MANAGE CONDENSATION:

Pitching:

  • Choose locations with as little dampness as possible.
  • Consider the use of a ground sheet to create a barrier to the damp ground.
  • Avoid depressions, which could trap moisture in particular.  This may not be always possible, but something to consider.
  • If possible avoid locations on the leeward side, and at the same time in shade most of the day.  Such locations tend to be colder with no benefit of the wind to keep your tent vented.

Venting:

  • Kyra has two vents provided, plus the door has mesh.  You may have to find a balance between keeping the tent vented, and warmth.
  • Wind direction is critical, in choice of the orientation of pitching.  Watch the direction of the wind.  Make sure your air vents are aligned in the direction of the wind.

Internal Moisture management:

  • Carry a microfiber cloth to wipe off excess moisture build up on the walls
  • Use a dry sack to store your wet gear.  If possible, dry out the wet gear during the day, and store in a dry sack during the night, and further if possible, outside the tent, to avoid moisture escaping inside the tent.
  • Dry out the tent before the next use.  Running the stove in the morning could help to dry things out.  Before packing in the morning, turn the tent inside out.  This allows the moisture to freeze, and then shake it out.

Condensation can’t be completely avoided.  So consider use of a sleeping bag with water resistant outer layer, and synthetic insulation, in relation to down sleeping bags. (Synthetic insulations have improved to the extent that they provide similar weight to insulation qualities as down)

If there is any feedback, query, or additional suggestions or thoughts, please do not hesitate to write to us at info@gipfelclimbing.com.

HOW TO CHOOSE A SLEEPING BAG LINER?

Sleeping bag liners are the humble but a critical piece of gear for outdoor adventures; severely underrated, but with huge benefits.

Imagine sleeping in a sleeping bag night after night, and not being able to wash the sleeping bag.  The liner offers a solution here, and more.

Sleeping bag liners provide many benefits:

  • Improved hygiene. Sleeping bag liners are significantly lighter, and easier to wash than sleeping bags themselves.  Between outdoor or backcountry trips, it is easier to wash a liner than the whole sleeping bag.  Or if going on extended trips, a couple of liners, help extend the time you can go without washing the sleeping bag itself.  Or if you are sleeping in hotels with uncertain hygiene of bed linen used, or on train journeys, sleeping bag liners prove to be the solution for ensuring hygiene.
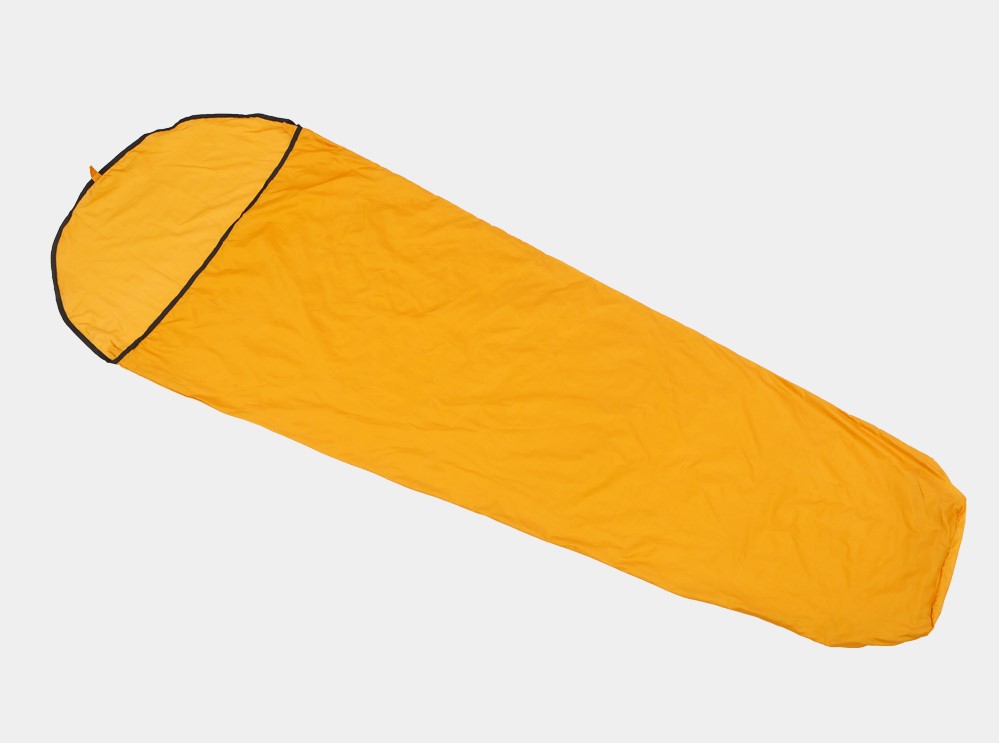
  • Lightweight sleeping bags. In warm weather or fair-weather conditions, sleeping bag liners can function as sleeping bags.  They are lighter and more economical than a sleeping bag.
  • Additional thermal insulation & warmth. Liners provide additional warmth during colder nights.  The additional amount of thermal insulation is dependent on the materials used.  They can also act as vapour barriers depending on the materials used, and help with preventing evaporative heat loss.
  • Comfort: Some liners, depending on the materials provide, next-to-skin comfort for those who are very discerning about such comfort vis-à-vis the fabrics used in a sleeping bag.
  • Economics: By using a sleeping bag liner, you will extend the life of your sleeping bag, which is typically a bigger investment.


SLEEPING BAG LINER MATERIALS


At Gipfel, we make 10 models of sleeping bags, based on material and shape!   Very few outdoor companies invest into as many models, as we do.  There is a reason for this.

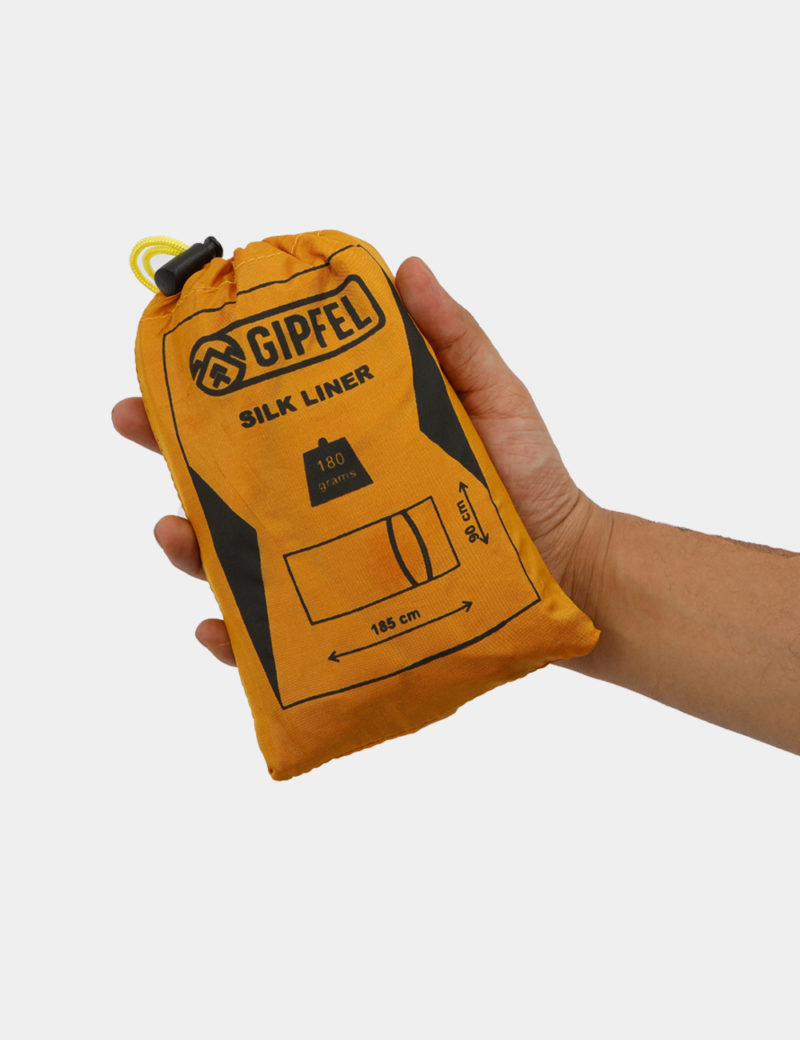
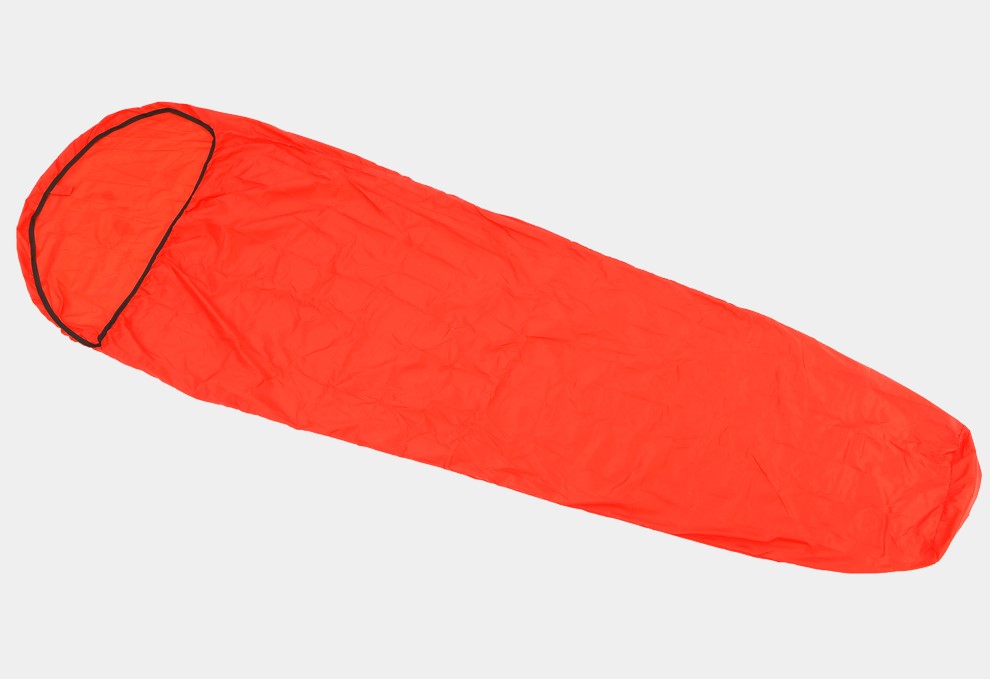
We offer liners in the following materials:

Each material provides certain advantages or disadvantages with respect to weight, price, thermal insulation or warmth, how quickly they dry, comfort to skin, and breathability.  Below is a comparison chart for our sleeping bags.

Liner material/Properties Weight (gms) Economics/Price Insulation/Warmth Quick drying? Comfort to skin Breathability
Cotton 290-300 Low Medium High
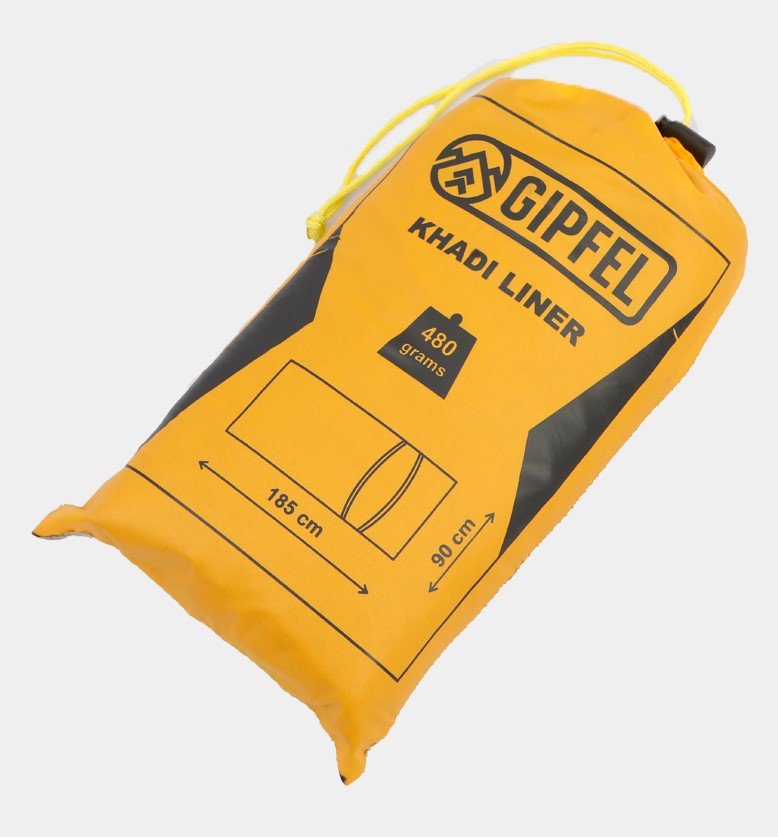
Khadi 460-480 Low Low Medium High
Silk 160-180 High High Quick High High
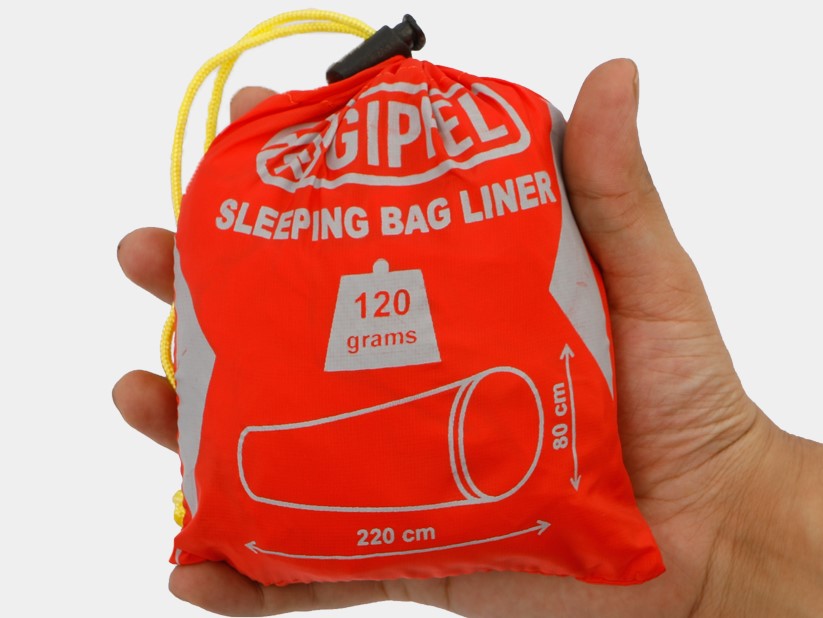
Nylon 120 Low Quick Medium Low
Fleece 500 Low Very high Medium High Low


SLEEPING BAG LINER SHAPE

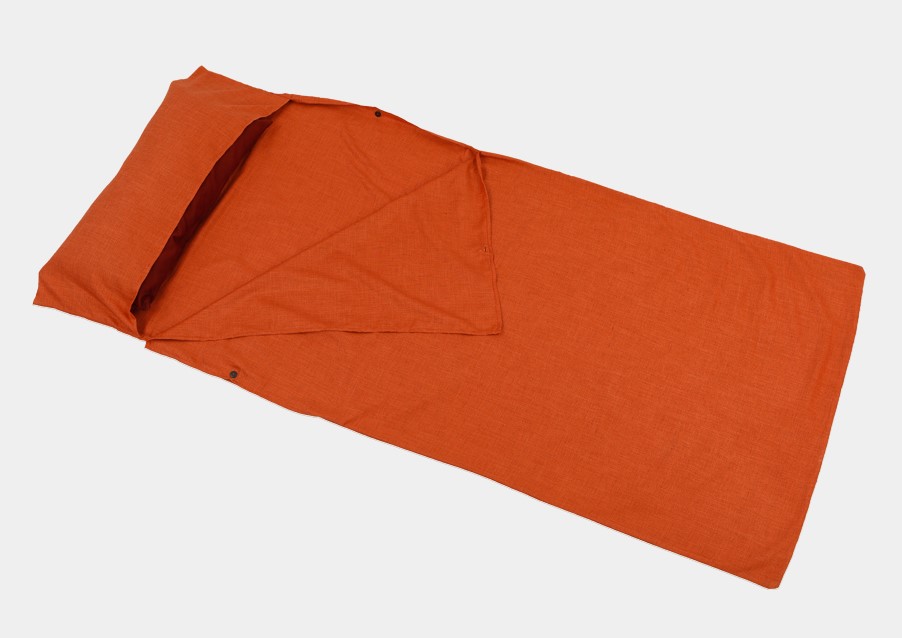
We make our liners in both Mummy shape and Envelope or Rectangular shape.

Mummy shape is more form fitting and compact, saves on some weight, and can prevent heat loss slightly better than an envelope shaped liner.  But on the flip side, can be constricting for some body types and based on sleeping position preferred.

For an Envelope shaped liner, flip the pros and cons as versus the above.  Cost wise, there is no difference.  Please note the prices mentioned below are as of November 2019, and may change over time.

Liner shape => Mummy Envelope/Rectangular
Material Weight (gms) Price (Rs.) Weight (gms) Price (Rs.)
Cotton with Lycra mix 290 925 300 925
Khadi / Linen 460 480
Silk 160 3250 180 3250
Nylon 120 860
Fleece 500 970


CLIMB RESPONSIBLY!

I was training on an ice-wall in Dokriani Bamak glacier, when suddenly debris started falling from above. Apparently the ropes dislodged a few frozen rocks from the ice. I heard instructors shouting “Watch out” that did draw my attention towards them but I could not see the rocks against the sun. A rock banged on my helmet and another one hit my wrist. Injuring my wrist was not a big issue but had I not been wearing a helmet, the rock would have crushed my skull. These things happen so suddenly that you don’t have enough time to move away from the fall line.

– Aditya Kulkarni during Gipfel survey on helmets

Helmets aren’t necessary… are they?

It depends from person to person. For some, the answer is no but for most the answer is, definitely yes! Any reputed mountaineering and climbing institute does not allow its climbers as much as even walk on moraines without wearing a helmet, let alone climbing without it.

Climbing is not just about body strength but rather techniques. It is also about taking calculated risks and making informed decisions. Any climber, who risks his own or anyone else’s life by not wearing a helmet, is often considered irresponsible. Such situations are not uncommon to come by, in which we see a climber climbing without a helmet but the spotter/belayer wearing one. So eventually the decision to whether or not wear a helmet varies from person to person.

According to surveys conducted by the British Mountaineering Council, most injuries to climbers happen on the lower leg but most of the fatalities are at least partly due to head injuries. Carefully weigh up your risks and then make decisions. All it takes is one bad day to indelibly scar you for life. A hybrid helmet in India does not cost much but can save your life.

That can’t happen to me….could it?

Two most common scenarios for head injuries during climbing are given below.

  1.  Falling objects

Probability of occurrence:


Risk of injury:   

First thing that comes to mind is being hit by debris in the form of rock, ice or grit. But it could be worse. It can even be rucksacks, ice axe of another climber, pitons, anchors or even climbers themselves.

2. Falling head first

Probability of occurrence:


Risk of serious head injury:


Less likely but not impossible are injuries due to impact on falls. This could be because of tripping over a rope or losing balance while abseiling. The possibilities are endless. If the climber falls head down and from a great height, that could almost always be fatal.

Helmets don’t look cool…do they?

Well, now most of them do! The hybrid helmets these days come in beautiful designs and colours. Other than that, wearing a helmet shows how responsible you are as a climber.

Choosing a right helmet!

There are three major factors to consider while choosing a helmet

  1. Fit and weight

Hybrid helmet is an all-rounder. The combination of hard shell and EPS foam lining offers greater comfort and greater protection compared to the other two types. It would be even better if the foam extends all the way down till the rim of the shell. Unlike regular shell type helmets that only works best for centered impacts, these kinds will protect you even during off-centered impacts. Most helmets have a rotatable adjuster on the back to adjust the fit. The chin-strap should also be adjustable. A good quality hybrid helmet offers all of these features and has a higher strength to weight ratio. The helmet should be snug on your head and shouldn’t slip. This happens the most while sweating and walking.

2. Ventilation

A Helmet that makes your head too warm may cause too much of a problem than just discomfort. At best it can lead to a reduction in your performance. At worst, it could lead you to making errors in judgement that causes injuries.

– BMC, Helmet Guide

A good ventilated helmet can have a much larger positive impact on your climbing than commonly believed. Vents allow for a passage of air that keeps your head cool and dry. However, at higher altitudes they may also create a lot of noise because of high winds. But the benefits of having vents more than make up for this limitation.

3. Headlamp attachments

Do check whether headlamp attachments are provided. They are best suited for mountaineering.

4. Price

The price of the helmet depends upon their type and properties. Generally, hybrid helmets are expensive because of their durability and impact resistance. Gipfel Alpine Helmet is very competitively priced at Rs. 2,800 because they are locally produced. The applicable standard for testing is EN 12492. The price of a helmet can go as high at Rs. 5,500 depending upon the manufacturer and helmet’s features.

So although wearing helmet is optional and not the first priority, you’d be far better off wearing it yourself and insisting others on wearing them too.

Climb safely and responsibly!

Alcohol for Stove Fuel

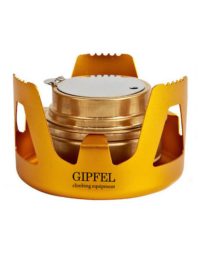
Our current solution for India for cooking stoves is an alcohol burner.

Gipfel Portable Alcohol Burner is light, leak-proof and very well built.  Importantly, we also chose this solution, because alcohol stoves provide a good balance between price and availability of fuels locally.

What Alcohol & Where to Buy:

So, what type of alcohol should be used and where could you find the same?

  • Denatured Alcohol
  • Pure Methanol
  • Pure Ethanol
  • Rubbing Alcohol


Denatured Alcohol, also known as methylated spirit, is ethanol with additives to make it unconsumable. Typical additives include isopropyl alcohol, acetone, methyl ethyl ketone, and methyl isobutyl ketone.

Where to buy: Medical stores, hardware store, Amazon.com


Pure ethanol burns best but is harder to find in India. You could get 99% ethanol, or from Industrial suppliers.

Where to buy: Industrial suppliers


Methanol burns well in an non-pressurised stove.  It will also work well at lower temperatures. However, the slightly toxic nature of the fumes needs to be considered for extended use. One could also consider creating a gel form out of Methanol to avoid it leaking.

Where to buy: Amazon.com


Rubbing alcohol is either isopropyl alcohol or ethanol-based liquids. Some form of it is also known as surgical spirit. Rubbing alcohol is less efficient than either of the above three alternatives.

Where to buy: Medical stores/Pharmacies


How much to Buy:

The amount of fuel requirement is subject to the efficiency of the fuel, altitudes, and temperatures.  Since, we are still experimenting with the efficiency of the fuels, we have seen anywhere from 90 ml per day requirement for a single person’s requirement to 45 ml, depending on whether it is Rubbing Alcohol to pure Methanol.

For now, we would recommend that you carry 200 ml for a day’s requirement for two people.

We will keep this blog updated on our findings.


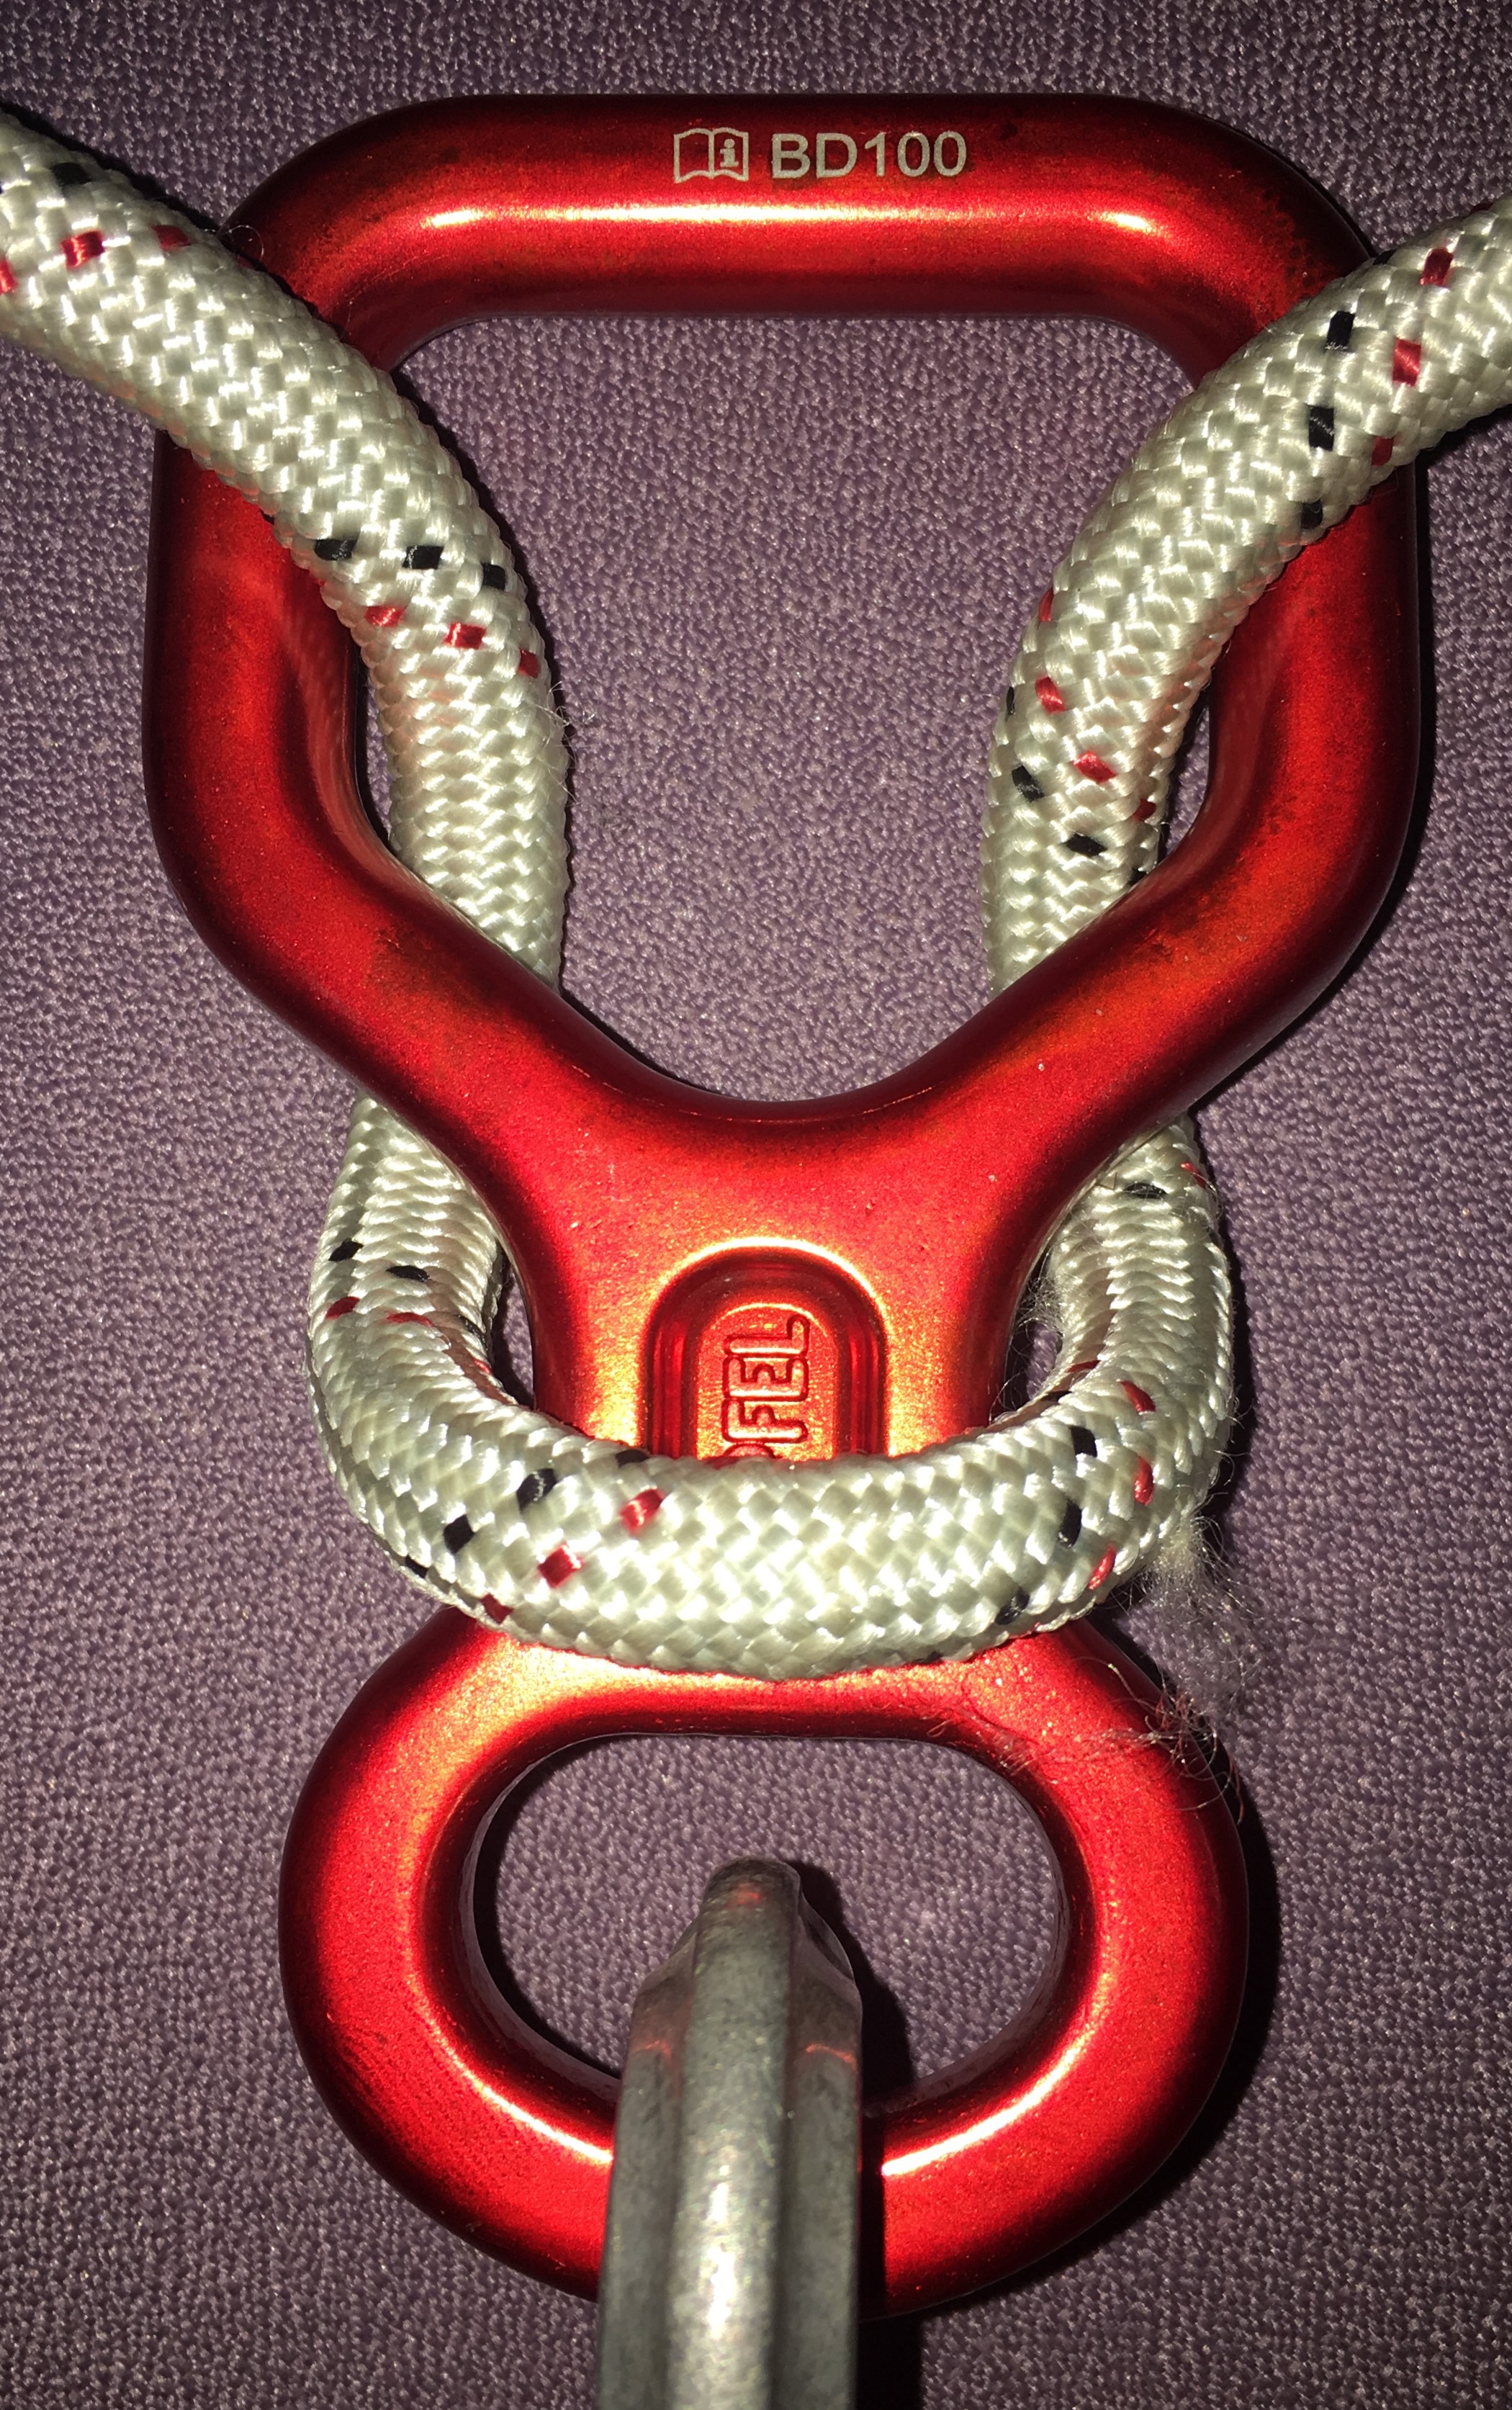
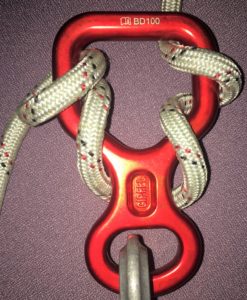
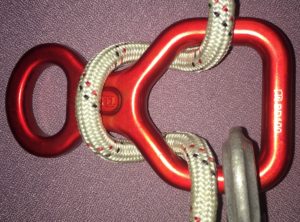
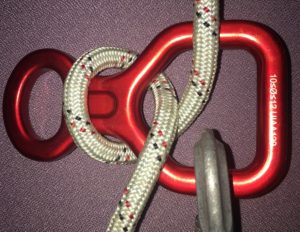
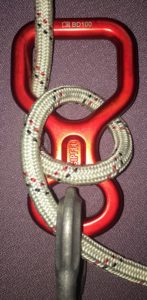
Gipfel Figure Eight Descender usage modes


A Figure of Eight Descender is a versatile tool, and here are some modes of usage.  Please note, that this is not a comprehensive instructional, and many nuances of using a Figure Eight Descender maybe missing in this limited scope article.

LEAD BELAYING: STICHT MODE

Figure Eight is primarily a descender.  While it’s primary purpose is not belaying, it has adequate friction for top-rope belaying in Sport Mode or Munter Mode.  For Lead Belaying, only one mode is recommended, and that is the Sticht Mode.

DESCENDING MODES

Below modes, provide various levels of friction.

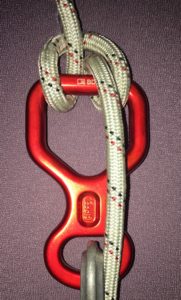
Normal Mode

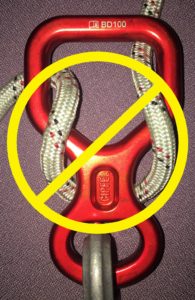
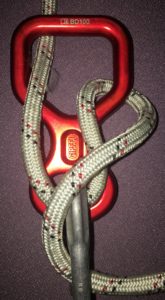
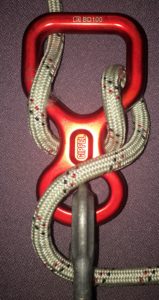
This is the most common or the standard mode for descending.  Please note, that the rope around the neck should pass from the front, or facing the climber/descender.  The rope passing from behind, creates a high risk of  Lark’s foot or girth hitch.  When the rope passes from behind, it can ride up when encountering an obstacle, and form the Lark’s foot.

Avoid this.

Lark’s Foot or Girth Hitching risk is as shown in the next image.  This locks up the device, and the operator wouldn’t be able to descend in this mode!

OTHER MODES OF FRICTION WITH FIGURE EIGHT DESCENDER:

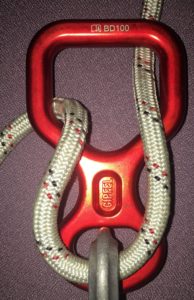
Sport Mode:

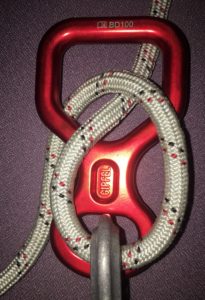
Munter or Cross Mode:

Rescue Mode:

Canyon Mode:

Auto-Stop Mode:

Figure-4 Wrap or Standard Vertaco Mode:

Sport Vertaco Mode:

Tete d’alouette Vertaco Mode:

HOW TO USE A REPAIR TUBE WITH TENTS?

Many people have asked us, “What is that extra small tube that you provide with every tent in the pole kit?” And few of them even think that these scraps are included in error.

The small tube provided is called the REPAIR TUBE, and we suggest that you carry it along with the tent.

Although our poles are made of 7000 series aviation grade aluminium, they can break if loaded in the wrong direction or if they are misused.

In situations like these, these repair tubes will be your saviours!

Here’s how to use them.

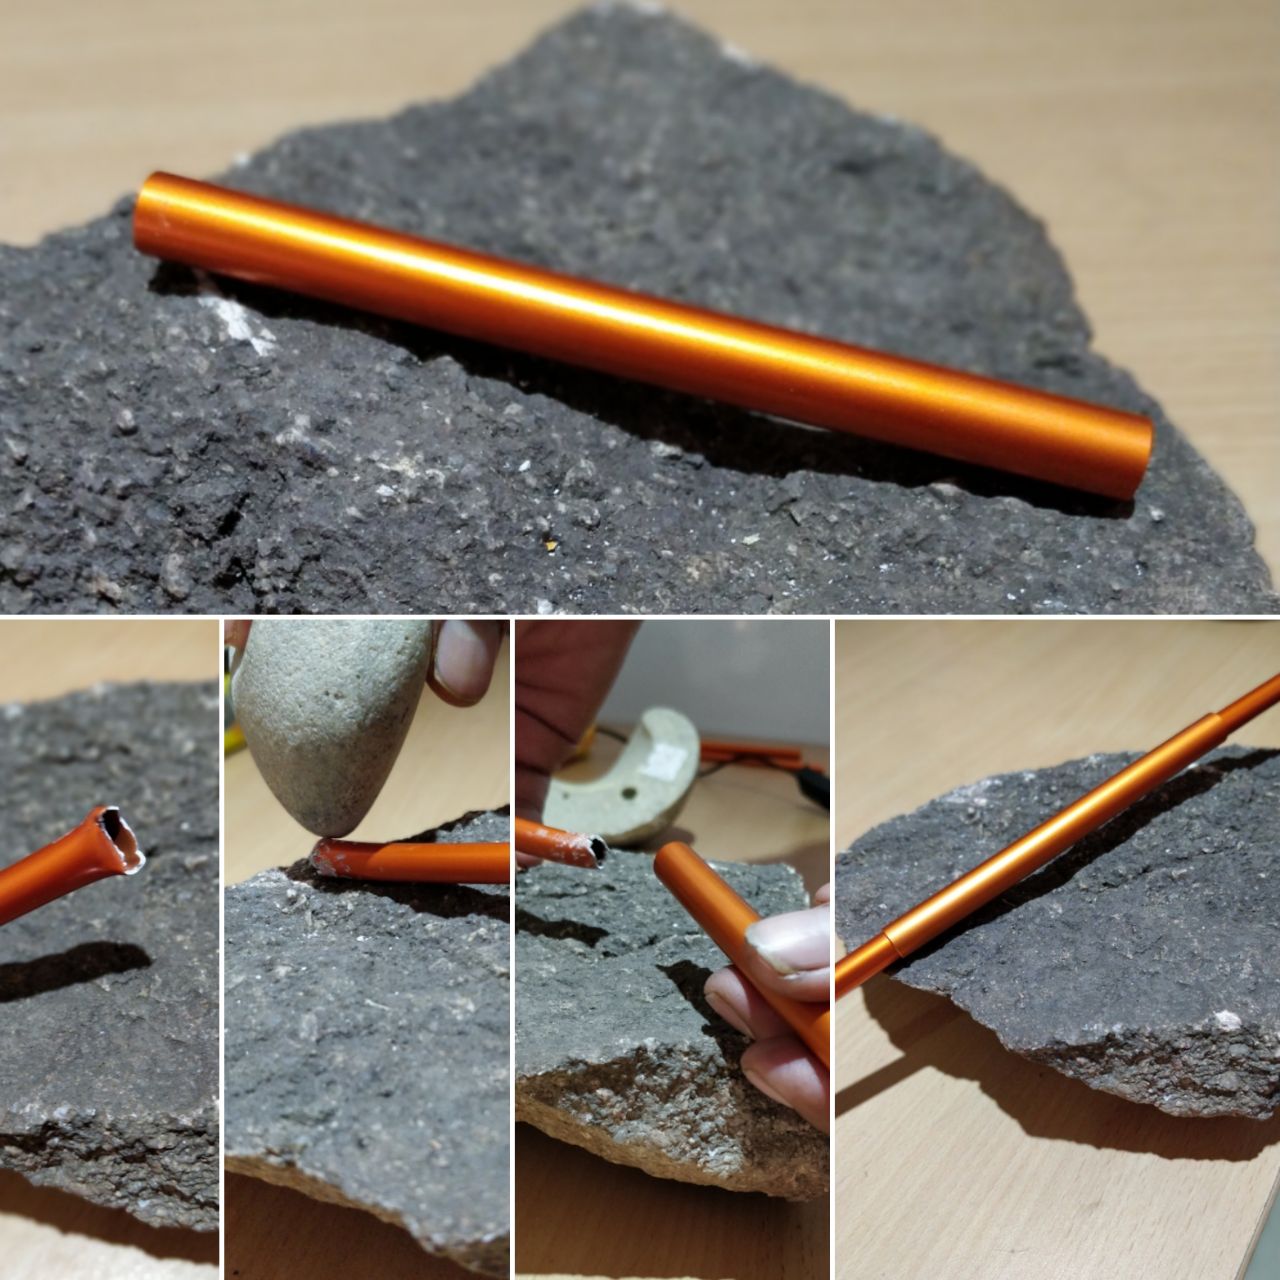
Step 1: Cut the elastic shock cord at the point of damage in the pole.

Step 2: When damaged, the pole’s broken tips flatten out and can become larger than the diameter of the repair tube. Reduce the diameter of the broken pole tips with the help of a rock or other means.

Step 3: Insert one broken tip of pole into the repair tube and pull the elastic shock cord through.

Step 4: Similarly attach the other elastic shock cord through the other broken pole.

Step 5: Connect both the elastic shock cords using a fisherman knot, and pull the knot though the pole.

Step 6: Slide the repair tube over the damaged section of the pole, and you are ready to go!


Please note that repair tubes are to be used temporarily, and ARE NOT a permanent solution. Do contact us in case of pole damage to advise and for replacement poles.

Safety-journal-for-gipfel-wedge-rock-anchor-bolts

SAFETY JOURNAL FOR GIPFEL WEDGE ROCK ANCHOR BOLTS

aa111 NOTE: Here we are only talking about the wedge type expansion bolts.

How do rock anchors fail?


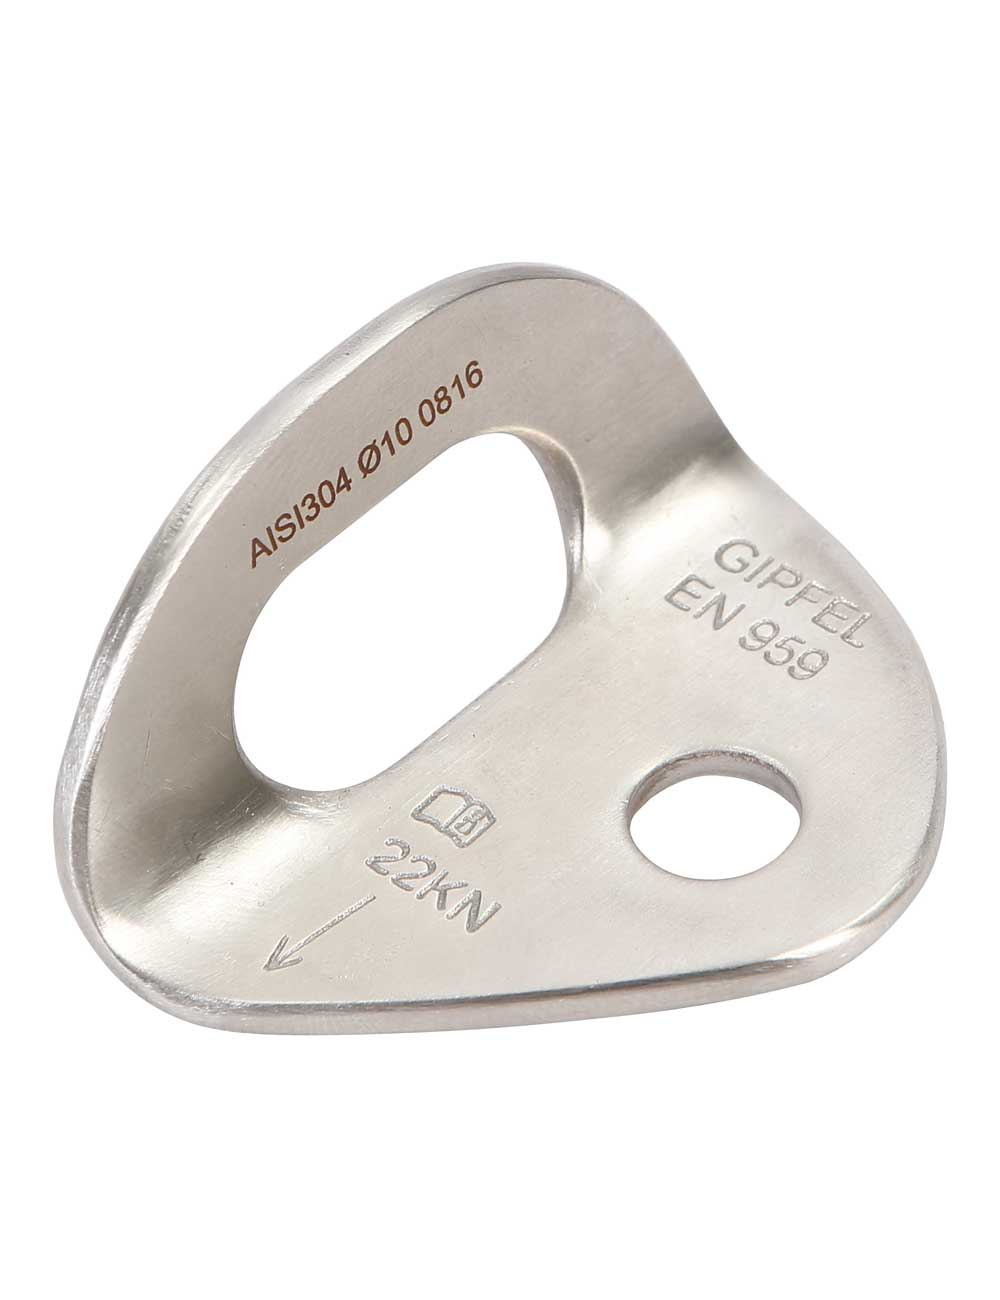
A rock anchor assembly mainly comprises of a Hanger and a Bolt.


Rock Hangers that are made from Stainless Steel (304 or 316) are very likely to have a minimum breaking strength of 25-28kN. Gipfel Dynamo anchors are rated at 25kN but in actual they may not break until they are loaded till 28kN. It is highly unlikely that a falling climber will ever achieve this kind of load. So, a hanger breaking is not our concern.


Anchor bolts, however, are. The most commonly used wedge bolts in climbing are M10 and M12 of varying lengths. The Tensile and Shear strengths of a reasonably made Wedge Anchor bolt will be above the breaking strength of the Hanger itself. So one may think they do not have to worry about anything while bolting a new rock. Sadly, this is not the case.

A wedge bolt is only as strong as the rock it is holding on to. If the rock crumbles too soon, the wedge anchor can pull off from the rock at lower loads.


In order to understand this, let’s see how a bolt works.


Installing a Wedge Bolt


After drilling an appropriate sized hole in the rock, one needs to hammer the bolt inside it. When hammering it inside, make sure that it does not become flush with the surface of the rock. There must be just enough threads left outside the rock surface to mount the hanger, washer and the nut. Now tighten the nut. When you do so, the wedge bolt is pulled outside the rock with each turn. This causes the innermost tapering wedge part of the bolt to pull outside and pass through the expanding sleeve causing it to expand. This expansion causes the wedge sleeve to push against the surrounding rock surface. Now the friction between the sleeve and the rock surface caused by this action is solely responsible for the holding force of the anchor.

Hanger02-500x650


What if the rock is soft?


If the rock is weak, flaky or crumbly, then the holding force discussed above will be too much for the rock to bear. Upon application of load, the bolt may crack the rock surrounding itself and thereby releasing the anchor.


Lets see how this works


aa1


When a bolt is subjected to an Axial Load, a shear force acts on the concrete or rock surface in a form of a cone.

PULL OFF STRENGTH OF THE BOLT =  SHEAR STRENGTH OF THE CONCRETE CONE.

THE SHEAR STRENGTH OF THE CONCRETE CONE IS DIRECTLY PROPORTIONAL TO THE SURFACE AREA OF THE CONE AND THE COMPRESSIVE STRENGTH OF THE ROCK.

YOU OBVIOUSLY CANNOT CHANGE THE COMPRESSIVE STRENGTH OF THE ROCK YOU ARE CLIMBING ON, BUT YOU CAN INCREASE THE SURFACE AREA OF THE CONE BY USING A BIGGER BOLT LIKE M12. DOING THIS WILL INCREASE THE SHEAR STRENGTH OF YOUR CONCRETE CONE.

Using a bigger bolt (larger diameter and bigger length) will increase the shear strength of the concrete by increasing the surface area of the shear cone. An increase in length will increase the ‘H’ value, hence, increasing the surface area of cone. A bigger diameter will in turn increase the vertex angle of the cone, thereby again increasing the surface area of the cone.


TESTING OF M10 AND M12 BOLTS ON DIFFERENT CONCRETE TYPES


In order to test the suitability of our M10 and M12 bolts on different rock types and to prove the above, we ran tests on several samples of concrete with varying Compressive Strengths. At the end of the test we had wasted 25 bolts but the results were very informative.


For the sake of convenience, we will only discus the results of the test we ran on a ‘weak’ sample of concrete with compressive strength of just 11MPa as well as on a ‘strong’ concrete with 50MPa compressive strength (as specified by UIAA).

The pull out strength of our bolts in different concretes are given below.

Snapshot 2016-08-09 11-37-35

aa111


THIS TABLE SHOWS AVERAGE PULL OUT STRENGTHS OF THE GIPFEL BOLTS IN DIFFERENT CONCRETE TYPES. UIAA’S MINIMUM REQUIREMENT IS 15kN BUT ON 50MPa CONCRETE.


DO’s AND DON’Ts while placing an anchor bolt


Here are a few guidelines that although not complete points out major important things to bear in mind while bolting a new route.


  1. INSPECT THE ROCK QUALITY


If the rock seems flaky and crumbly, do NOT place an anchor there. Look for another area.


  1. CHOOSING AN APPROPRIATE BOLT


If the rock is a softer kind such as Limestone and Sandstone, NEVER use the M10 bolts. Use M12 for soft and medium strength rocks. M10 is only suitable for high compressive strength Granite and Gneiss rocks.


  1. PLACEMENT OF BOLTS


The distance between two successive bolts should be at least a distance equivalent to 15 times the diameter of the bolt. Also any bolt should at least be 20 times the diameter of the bolt distance apart from any blind edge of the rock. Not doing so can reduce the strength of the cone.


  1. LENGTH OF DRILLED HOLE


The length of the drilled hole must at least be equal to the full length of the bolt. If the bolt can no longer be used, you can hammer it all the way inside the rock and make it flush with the rock surface so that it doesn’t protrude out.


  1. CLEANING THE DRILLED HOLE


The drilled hole must be properly cleaned from debris and dust before placing the bolt inside it. The dust and debris can reduce the holding friction between the expanding sleeve and rock surface.


Share
FacebookTwitterGoogle+